Happy & Fun with the February Hip Kits!


Hey everyone,

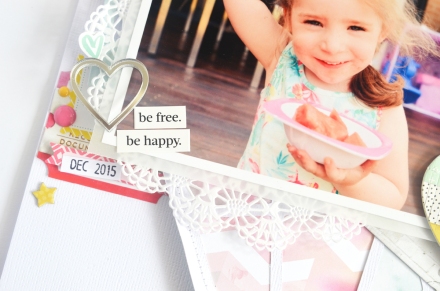
I'm here again with a layout featuring the February kits and the exclusive cut file by Kim Watson. Lots of the team and forum members have been creating with the cut file and I was inspired to give it a go too! I took a few photos of my kiddies one hot summer day while they were eating watermelon. I just love this one of my daughter, it just captures her so beautifully and I really wanted to scrapbook it.

  happy and fun-logo

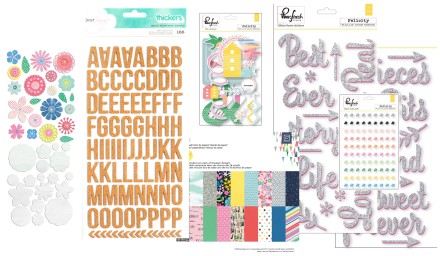
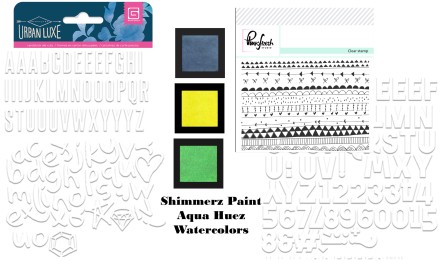
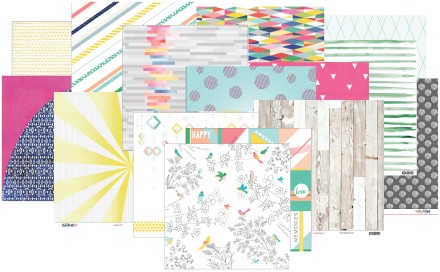
 When choosing colours from the February kits, I went with a mint, pink, and yellow colour palette with a touch of silver. I backed the cut file in four different sections, using the Pink Paislee and Crate Paper papers within the kit. The colours in my daughters top matched these papers perfectly.

  happy and fun-1

I was totally in love with these fringed hearts by Crate Paper and was happy to get one on a layout where it coordinated beautifully. I stitched around the edge of the die cut too for extra detail.

  happy and fun-2

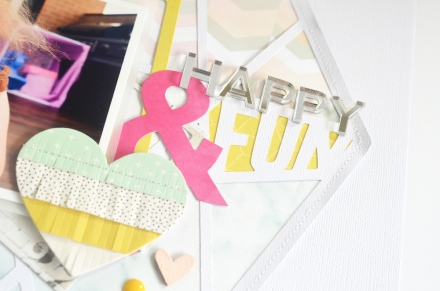
I created a cluster to the top right of my page. It was a combination of stickers from the Amy Tangerine sticker pack, some chipboard, and finished off with a Dear Lizzy word sticker.

  happy and fun-3

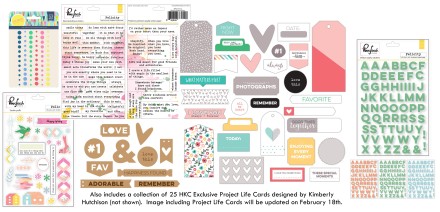
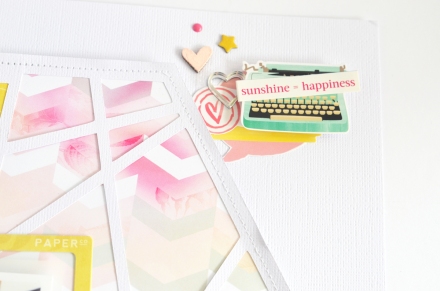
I also created another cluster to the bottom left of my photo. Lots of stickers layered there and finished with a Pink Paislee mirror heart and a couple of word stickers. I stamped the month and year on a piece of scrap card stock and cut it out to stick on top of one of the labels.

  happy and fun-4

 I decided to include the word 'fun' from the cut file into my title. I added the Happy mirror word and ampersand die cut from Pink Paislee.

  happy and fun-5

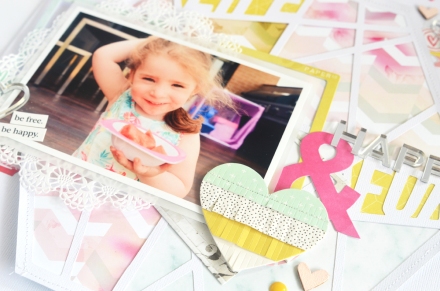
 The whole hexagon was adhered to the page with foam tape, but I also adhered the photo layer with foam too. This provides lots of dimension and detail to a page. The page was finished with a couple of enamel dots by Simple Stories.

Raquel x


Mood Board layout using February Hip Kits


Hey everyone, I'm here with you today to share with you my first layout using the February kits. All I can say is WOW! The colours in this kit are just amazing, the navy, the pink, teals and yellow! Totally in love! The layout I created which was inspired by the February Mood Board

  12440679_10154004260842566_4481751580307234527_o

I was inspired by the arrangement of the buttons in the top left corner and the navy, pink and yellow colourings in some of the images.

  theworldislimitless-raquel-logo

 I wanted to document this photo of my kiddies taken at a local regional park. The colourings in this kit were perfect for this photograph and really complement it rather than detract from the photo which I like.

  theworldislimitless-raquel-1

 I used my cuttlebug machine and circle dies from my stash to create multiple circles from three of the patterned papers in the Main Kit. I added the date to the bottom of the page on one of the Amy Tan stickers in the Better Together sticker book. There was so much on those sheets to choose from!

  theworldislimitless-raquel-2

 For the journaling I decided to play on the Shimelle chipboard sticker title and expand on that. I typed it on my typewriter, adhered it in strips and added a little stitching to finish. I am absolutely loving the colours and icons in the Shimelle collection after seeing them in real life, does anyone else find that?

  theworldislimitless-raquel-3

 I created a cluster to the left of the photo. To do this I combined a Heidi Swapp post notes, stickers from the Amy Tan sticker book, a Shimelle chipboard piece and a Dear Lizzy word sticker which said 'lets be adventurers'. Just perfect!

  theworldislimitless-raquel-4

 I loved that the Shimelle chipboard sticker was round and thought it would continue the circles theme throughout the layout perfectly as it tied together all the colours I used. I popped this up on foam tape to add some extra dimension. I also added a couple of extra embellishments to form a bit of a cluster.

  theworldislimitless-raquel-5

I love creating a layout with a variety of circles, it is so much fun and is a great design to incorporate into your pages.

 I have also made a video for this layout so you can look closer at my process while creating this layout. You can see it below.


Raquel xx

Documenting my One Little Word for 2016 with Pink Paislee.


When I first saw this Notebook, the stationary addict in me just wanted to hoard it forever and never use it. You know, the stationary items that you are saving for the perfect project? Well to me this notebook was it! However, when thinking carefully about what I might like to use it for I decided that I would use it to document my 'word' and goal for 2016. So my 2016 Notebook of Goals and quotes to inspire was born. C'est La Vie: Spiral Notebook @raquelLbowman @pinkpaislee #pinkpaislee #ppcestlavie #scrapbooking #notebook

 I thought very hard about what I wanted my word to be, there were a few changes I knew I wanted to make in my life for 2016.

  C'est La Vie: Spiral Notebook @raquelLbowman @pinkpaislee #pinkpaislee #ppcestlavie #scrapbooking #notebook

 In summary the changes were
 -to be more present in my day to day, to enjoy each moment and try to stress less
 -to start looking after my physical and mental health, focus on me a little more rather than always putting everyone else ahead of me
 -to devote time to creating as it is something that makes me happy and nourishes my soul
  C'est La Vie: Spiral Notebook @raquelLbowman @pinkpaislee #pinkpaislee #ppcestlavie #scrapbooking #notebook

These thoughts led me to choices, because after all these changes would not take effect unless I choose for them to ... so my word is I Choose....
  C'est La Vie: Spiral Notebook @raquelLbowman @pinkpaislee #pinkpaislee #ppcestlavie #scrapbooking #notebook

 The numbers in the ephemera pack were perfect for this statement cover page. I used the chipboard letters from the collection to spell out 'I choose'. I love how well this all fit on the page of the notebook.
  notebook raquel 5

 To help the 2016 acetate pieces stand out I decided to mount it on some vellum to help it pop.

  C'est La Vie: Spiral Notebook @raquelLbowman @pinkpaislee #pinkpaislee #ppcestlavie #scrapbooking #notebook

 My starting page for my notebook is documented by a photo of myself and a quote that inspired me to choose this word...as soon as I saw it I related to it on every level. To embellish the page I used a variety of die cut ephemera, cut apart words from one of the patterned papers and even some fussy cut flowers.

  C'est La Vie: Spiral Notebook @raquelLbowman @pinkpaislee #pinkpaislee #ppcestlavie #scrapbooking #notebook

I decided to put the quote directly on top of my photo - I did this using the Phonto app.
  C'est La Vie: Spiral Notebook @raquelLbowman @pinkpaislee #pinkpaislee #ppcestlavie #scrapbooking #notebook

 I embellished the top half of this double page spread simply by adding a layer of patterned paper and  attaching a 4x6 card from the acetate sheet.

  C'est La Vie: Spiral Notebook @raquelLbowman @pinkpaislee #pinkpaislee #ppcestlavie #scrapbooking #notebook

 The layering on this page was a combination of lots of paper scraps from the collection that I had left over from creating a couple of layouts. I also used one of the 3x4 acetate cards which I placed under my journaling. I have decided that I will continue this album by adding quotes that speak to me, journaling prompted by my word and the progress etc throughout the notebook.

I love that my years thoughts will be contained in the one little album. I hope my post today has given you an idea for use wth the notebook.

 Raquel x
 

A Totally Rad layout with Cocoa Vanilla Studio


Hey everyone,

I am so excited to be sharing my first layout with the totally awesome Totally Rad collection. To say I love this collection would be an understatement.  I absolutely adore the colour palette of blues, lime green and pops of black and white. Here is the layout I created of my little man.

awesome-raquelbowman-1

I wanted to have the focus of the layout on my cute little mans cheeky face. So I cut the paper in a way that made sure that your eyes were directed to it. awesome-raquelbowman-2

I positioned the embellishments, like this pointing hand in a way that still directed your eyes to the photo. awesome-raquelbowman-3

The die cut ephemera were so perfect to layer and cluster to the side of the photo. I layered them with varying foam tape heights. The flair button layered perfectly in there too.

  awesome-raquelbowman-4

The brush script words in the die cut ephemera are so easy to use as a title. I added another little die cut piece to act as a sub-title too.

  awesome-raquelbowman-5

I also applied the wood veneer to the bottom corner of the page, and used them in a way to direct your attention back into the photo. How cute are the 'woodies' epoxy wood buttons. I just love them. I also used the stickers, and enamel shapes. I love that the enamels come in shapes now too!

  awesome-raquelbowman-6

I pulled out my trusty typewriter to add my journaling. I wanted to document what a cute little spunk this man is!

   awesome-raquelbowman-7

I added a lot of paper layers underneath my photo. Some of them were cut into two pieces and adhered either side of the photo to give the illusion that the layer is one continuos piece.

I have created a process video of this layout which you can see below this video better explains my process and how this layout came together!


 Raquel xx

The March Hip Kits are revealed!


Hey everyone

Just a quick update for you today revealing the March kits from Hip Kit Club. All the details and contents of the kits are below - Check them out, you won't regret it!

*********************************************

HIP KIT CLUB – MARCH 2016 – MAIN KITMain
Hip Kit Club Member Price:  $29.95 (requires a 3 month minimum subscription)CLICK HERE to join!Individual Kit Purchase Price:  $34.95 
Products Included:
  • 1 sheet – HKC Exclusive – Just Dream – Dreamy Paper – designed by Kim Watson
  • 1 sheet – HKC Exclusive – Just Dream – Soar Paper – designed by Kim Watson
  • 1 sheet – HKC Exclusive – Just Dream – Wonderful Paper – designed by Kim Watson
  • 1 sheet – HKC Exclusive – Just Dream – Abandon Paper – designed by Kim Watson
  • 1 sheet – HKC Exclusive – Just Dream – Explore Paper – designed by Kim Watson
  • 1 sheet – Basic Grey – Urban Lux – Lunette Paper
  • 1 sheet – Pink Fresh Studio – Felicity – Pretty Stripe Paper
  • 1 sheet – Pink Fresh Studio – Felicity – Ombre Wall Paper
  • 1 sheet – Pink Fresh Studio – Felicity – Flower String Paper
  • 1 sheet – Pink Fresh Studio – Felicity – Floral Birds Paper
  • 1 pkg. – Pink Fresh Studio – Felicity – Washi Tape Stickers (includes 3 sheets)
  • 1 pkg. – Pink Fresh Studio – Felicity – Wood Blocks
  • 1 pkg. – Basic Grey – Saturday Morning – Ephemera
  • 1 pkg. – Basic Grey – Saturday Morning – Printed Cork Stickers
  • 1 pkg. – Crate Paper – Maggie Holmes – Shine – Doll Puffy Thickers


HIP KIT CLUB – MARCH 2016 – EMBELLISHMENT ADD-ON KIT
Embellishment
Price:  $29.95**Hip Kit Club members receive a 15% off on all Add-On Kit purchases
Products Included:
  • 1 pkg. – Basic Grey – Saturday Morning – Flower Kit (cardstock, tissue, tulle & buttons)
  • 1 Basic Grey – Saturday Morning – 6×6 Paper Pad
  • 1 pkg. – Pink Fresh Studio – Felicity – Die Cut Shapes
  • 1 pkg. – Pink Fresh Studio – Puffy Sequin – Stickers
  • 1 pkg. – Pink Fresh Studio – Felicity – Silver Glitter Phrase Stickers
  • 1 pkg. – American Crafts – Dear Lizzy – Documentary Cork Thickers

HIP KIT CLUB – MARCH  2016 COLOR ADD-ON KIT
Color
Price:  $22.95*
*Hip Kit Club members receive a 15% off on all Add-On Kit purchases
Products Included:
  • 1 pkg. – Basic Grey – Urban Lux – Alphabet & Shape Watercolor Paper Die Cuts
  • 1 Pink Fresh Studio – Clear Stamp (3″x4″)
  • 1 jar – Shimmerz – Aqua Huez Watercolor – Blue Moon
  • 1 jar – Shimmerz – Aqua Huez Watercolor – Crazy Daisy
  • 1 jar – Shimmerz – Aqua Huez Watercolor – Green w/ Envy

HIP KIT CLUB – MARCH 2016 PROJECT LIFE ADD-ON KIT
Project Life
Price:  $29.95*
*Hip Kit Club members receive a 15% off on all Add-On Kit purchases
Products Included:
  • 20 HKC Exclusive Project Life Cards – designed by Kimberly Hutchison (not shown – image to be updated this week)
  • 1 pkg. – Basic Grey – Saturday Morning – Enamel Dots
  • 1 pkg. – Pink Fresh Studios – Felicity – Studio Puffs Stickers
  • 1 pkg. – Pink Fresh Studios – Felicity – Word & Phrase Stickers
  • 1 pkg. – Pink Fresh Studio – Felicity – Mini Vellum Alphabet Stickers (3 colors)
  • 1 pkg. – Elle’s Studio – Little Moments – Die Cuts
  • 1 pkg. – Elle’s Studio – Little Moments – Wood Veneer Shapes

HIP KIT CLUB – MARCH 2016 PAPER ADD-ON KIT
Paper
Price:  $13.95*
*Hip Kit Club members receive a 15% off on all Add-On Kit purchases
Products Included:
  • 1 sheet – HKC Exclusive – Just Dream – Dreamy Paper – designed by Kim Watson
  • 1 sheet – HKC Exclusive – Just Dream – Soar Paper – designed by Kim Watson
  • 1 sheet – HKC Exclusive – Just Dream – Wonderful Paper – designed by Kim Watson
  • 1 sheet – HKC Exclusive – Just Dream – Abandon Paper – designed by Kim Watson
  • 1 sheet – HKC Exclusive – Just Dream – Explore Paper – designed by Kim Watson
  • 1 sheet – Basic Grey – Urban Lux – Lunette Paper
  • 1 sheet – Pink Fresh Studio – Felicity – Gold Foiled Chevron Stipe Vellum
  • 1 sheet – Pink Fresh Studio – Felicity – Pretty Stripe Paper
  • 1 sheet – Pink Fresh Studio – Felicity – Ombre Wall Paper
  • 1 sheet – Pink Fresh Studio – Felicity – Flower String Paper
  • 1 sheet – Pink Fresh Studio – Felicity – Floral Birds Paper

HIP KIT CLUB – MARCH 2016 – CARDSTOCK ADD-ON KITCardstock
Price:  $10.95*
*Hip Kit Club members receive a 15% off on all Add-On Kit purchases
Products Included:
  • 6 sheets – American Crafts White Cardstock
  • 2 sheets – American Crafts Light Kraft Cardstock
  • 2 sheets – American Crafts Peapod Cardstock
  • 2 sheets – American Crafts Butter Cardstock

In the Summertime with Cocoa Vanilla Studio


Hey everyone, I'm here today to share with you my latest layout using the Hello Sunshine collection by Cocoa Vanilla Studio. I am just loving this bright, fun, summery collection! 

This layout features my little man and was photos from a summer day when the kiddies were eating watermelon. 

I created multiple layers on this layout using a variety of embellishments from the cut apart sheet, die cuts, wood veneer, woodies, puffy stickers and enamel shapes. 

I created a small cluster to the bottom right of the page to help draw your attention back into the photo. The arrows from the puffy sticker pack and wood veneer were for that purpose too. 

I loved the 'in the summer time' stickers from the sticker sheet. It is full of colour and looks like a sun. I teamed this with die cut clouds I cut with my Silhouette Cameo and purchased in the Silhouette Online store. To create dimension I added the clouds and stickers with varying depths of foam tape.  

That die cut sun from the ephemera pack and the cloud wood veneer matched this design perfectly. 


I also hand cut the love this tab from the cut apart sheet. These are easy to attach with a quick staple. 

I have created a process video for this layout which you can see below. 


I hope this layout has inspired you today xxx


Valentines layout with a statement title - Pink Paislee

Hey everyone,

I'm here with a Valentines themed layout today. I have created a statement title on my layout using the C'est La Vie collection. Being a valentines layout I decided to scrapbook a photo of hubby and I from our wedding. I adore this photo as our photographer got us to stand still while the wedding party were jumping off at the side in a real blurry action shot. It made me think of love quotes where time stood still and that is where my inspiration came from for this page.

  C'est La Vie: Valentines layout @raquelLbowman @pinkpaislee #pinkpaislee #ppcestlavie #scrapbooking #layout  

 To begin my quote I used the chipboard letters from the C'est La Vie collection. I spaced the word out evenly and centered on my page using my t-square ruler. I then used my wide format printer to print the remaining quote. When planning this page I worked out approximately where my quote was going to sit to help me print it in the right place. The quote and chipboard letters make such a statement on this page that it is so obvious the meaning I am trying to convey.

  C'est La Vie: Valentines layout @raquelLbowman @pinkpaislee #pinkpaislee #ppcestlavie #scrapbooking #layout

 I have a designer tip for you today which I have already found so handy when creating with these chipboard letters. When creating I title I flip my packet over and mark off the letters that I have used so far. This means that when I create a page next time, I know what letters I have available and makes it easier to know what titles will work and which won't. So handy!

  C'est La Vie: Valentines layout @raquelLbowman @pinkpaislee #pinkpaislee #ppcestlavie #scrapbooking #layout  

 I created a cluster of embellishments using the die cut ephemera, a puffy sticker, the word stickers and one of those gorgeous clips.

  C'est La Vie: Valentines layout @raquelLbowman @pinkpaislee #pinkpaislee #ppcestlavie #scrapbooking #layout  

 I normally always have a total of three cluster groupings on my pages to help achieve balance. This cluster in the bottom left corner combines the die cut ephemera, the puffy stickers, word stickers and those gorgeous mirror acrylic stickers.

  withyou-raquel-3

 Behind my photo is a combination of layers using two of the patterned papers and half a 4" doily. I wanted to keep this page nice and soft so I chose papers and embellishments that contained pink, grey, white, gold and a contrast of black.

  C'est La Vie: Valentines layout @raquelLbowman @pinkpaislee #pinkpaislee #ppcestlavie #scrapbooking #layout  

 This collection definitely leads itself to creating beautiful and elegant Valentines pages!

  C'est La Vie: Valentines layout @raquelLbowman @pinkpaislee #pinkpaislee #ppcestlavie #scrapbooking #layout

I will be sharing a process video for this layout soon on my YouTube channel so pop on over and subscribe to stay up to date.

 Raquel xx