All Smiles with the December Hip Kits

Hey everyone, I'm here today sharing my latest layout with you using my December Hip kits. For this layout today I decided to create a page for my Son documenting a special little everyday moment that I wanted to record.

 My son is two and it was becoming a struggle to get him to brush his teeth daily. He simply didn't like doing it, whether I did it or encouraged him to brush, it wasn't an easy task. The moment I am documenting is photos taken on the day that I had a bit of a 'lightbulb' moment and decided to make brushing fun by buying him a battery operated Spiderman toothbrush. As you can see from the photo - we didn't have any trouble getting him to brush his teeth again. If the truth be told, I have had to tell him to stop brushing them a few times as her wanted to brush them multiple times in a day, ha. Winning!

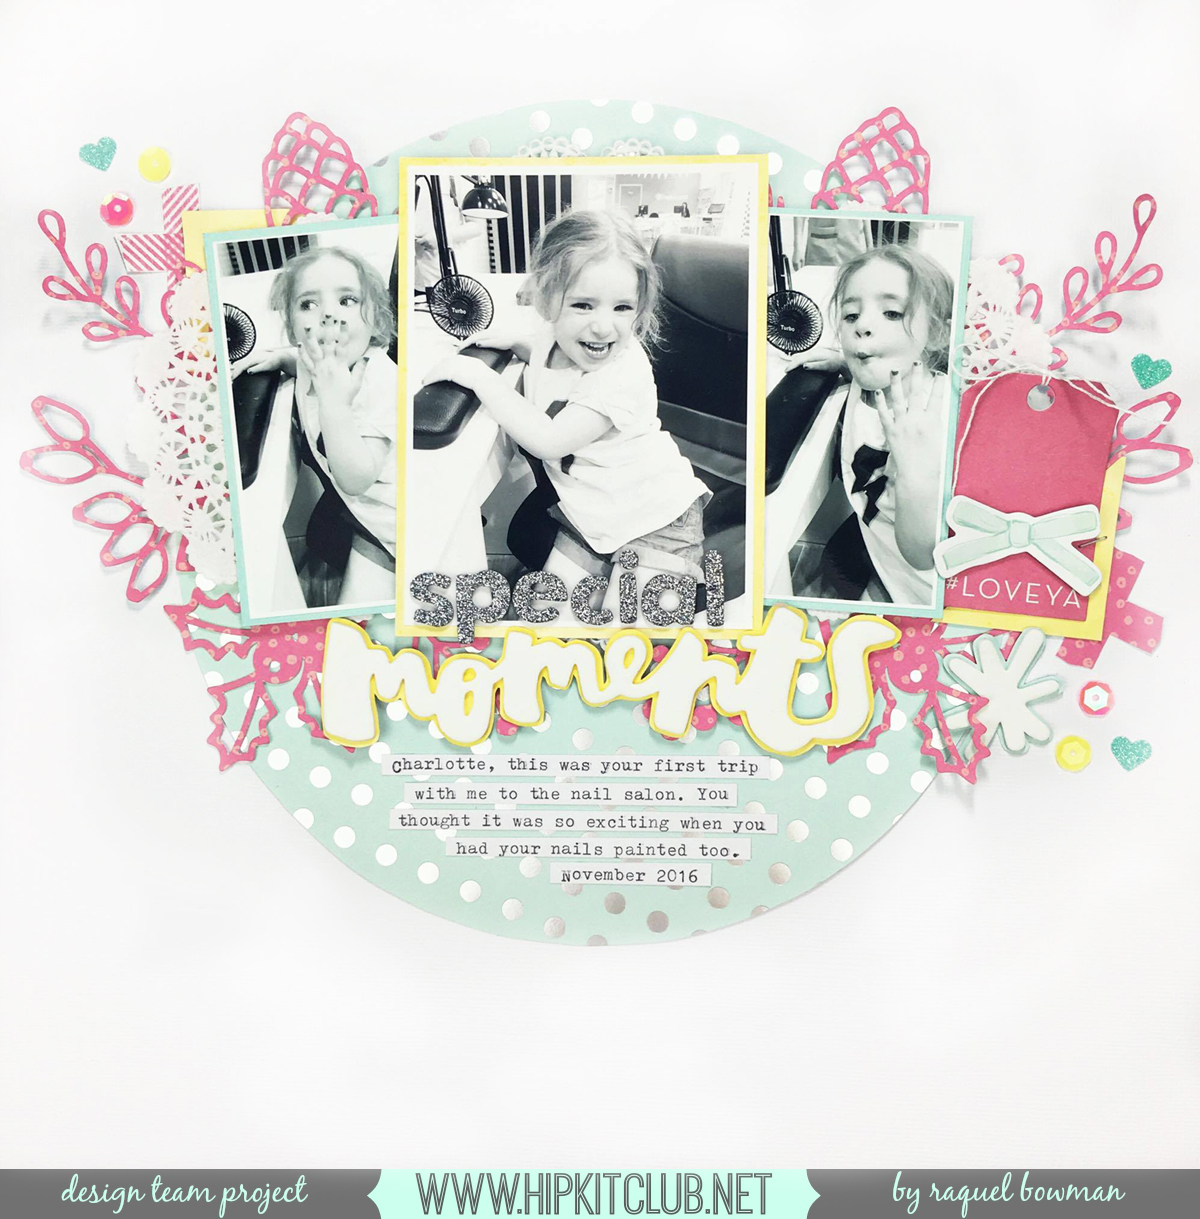
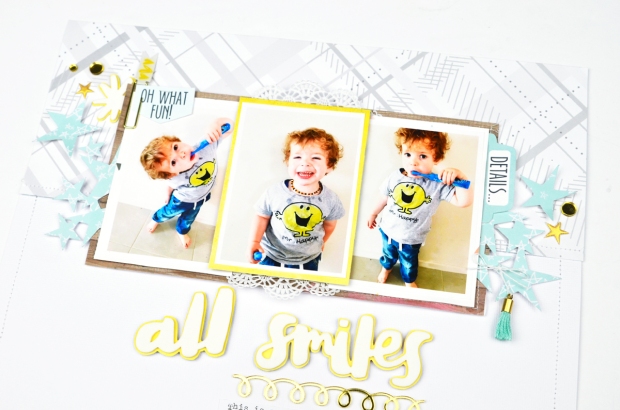
 Here is the layout I created: All Smiles all-smiles

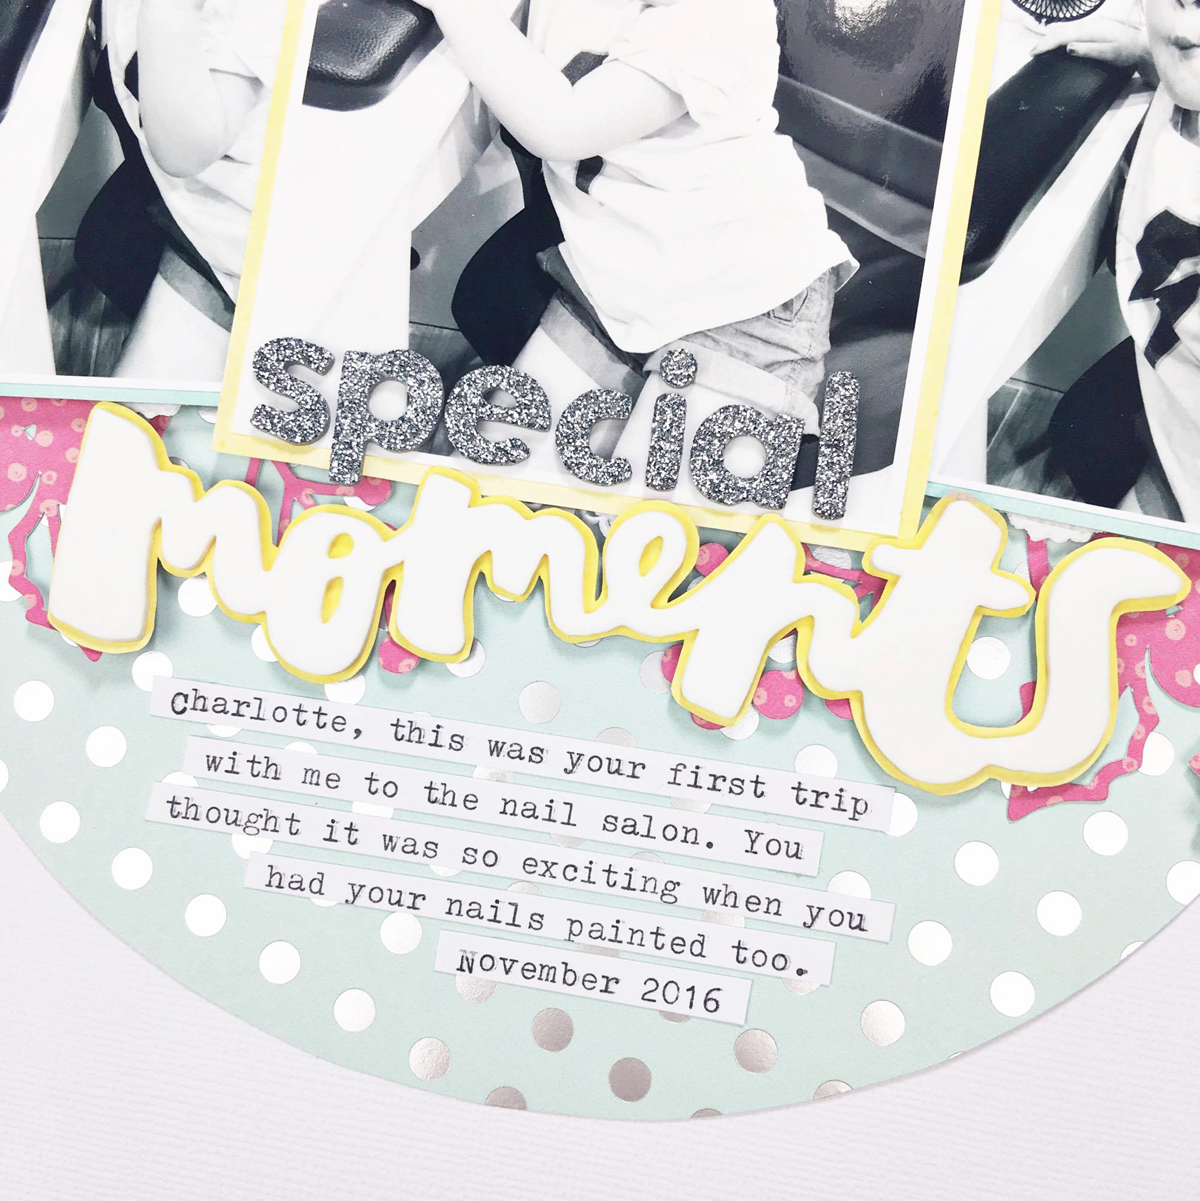
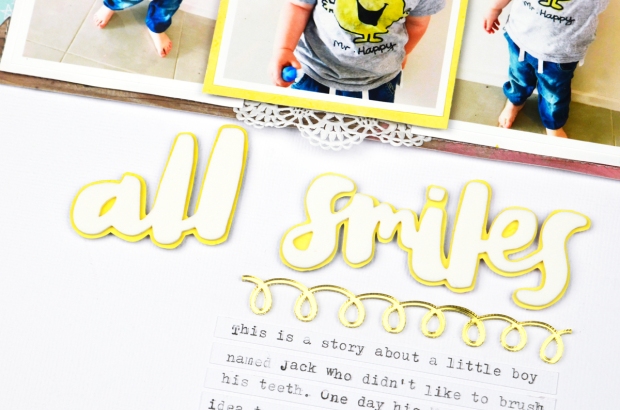
 I thought the title of 'all smiles' from the Amy Tan Thickers pack was perfect for this page. It is clear in his cheeky grin that it is a smiley page, but also because the documenting is all about his pearly whites. To help the white foam pop off the page, I backed it on one of the Take Me Away Pink Paislee patterned papers. I also adhered it to the page with a foam tape. I love the shadow the title provides. I knew I wanted to add a fair bit of journaling and tell my story, so I thought the mirrored swirl would act as a nice transition into the journaling.

  all-smiles-2

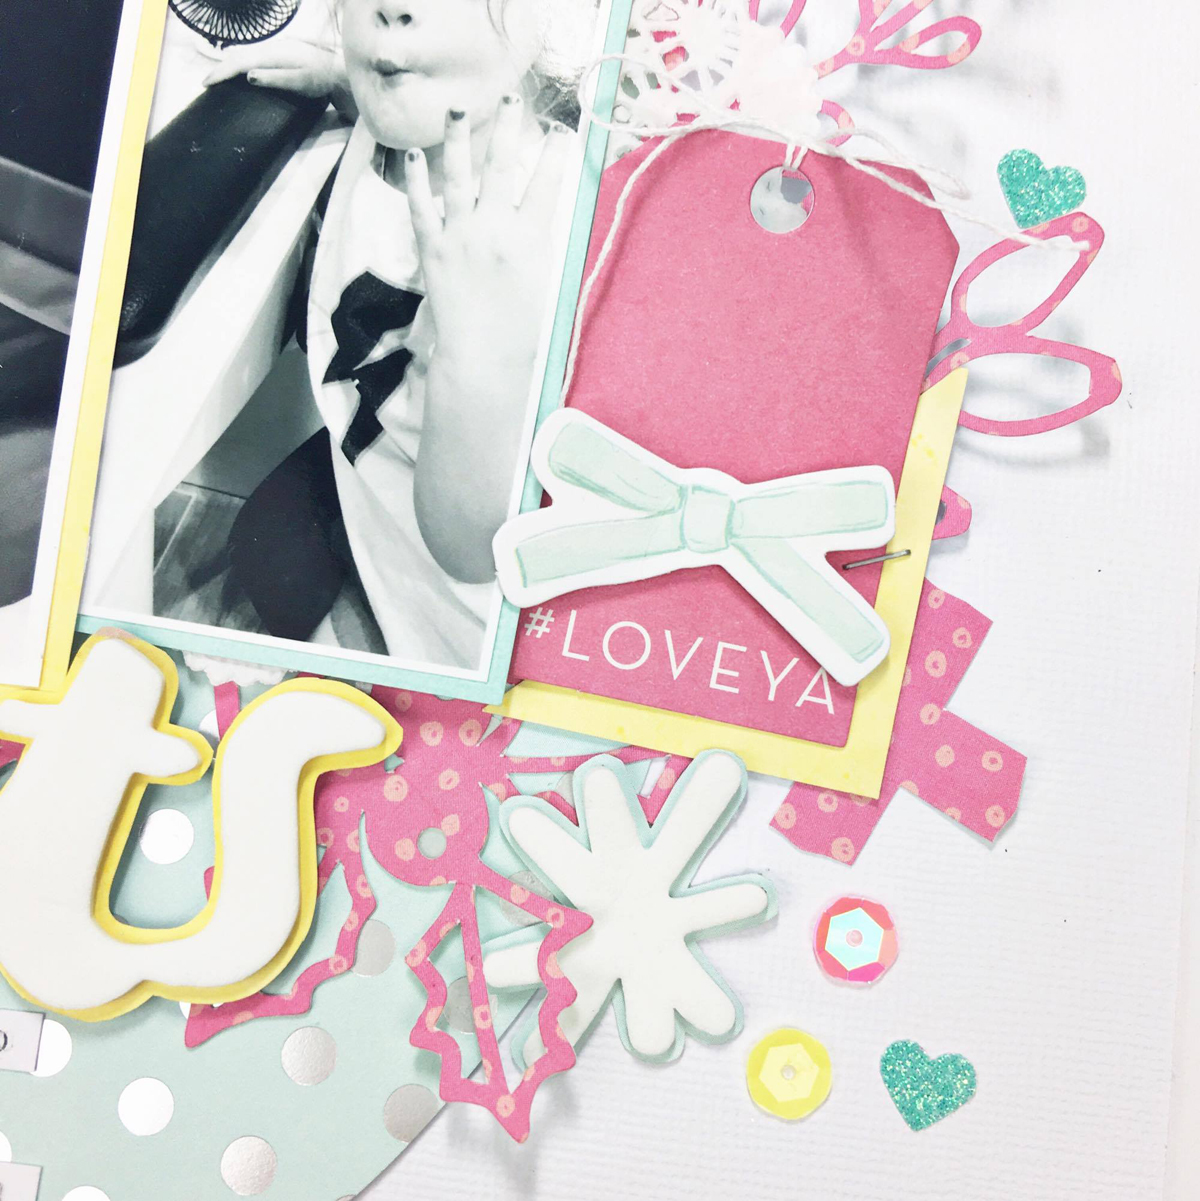
Because the page was documenting multiple photos I added small clusters to either side of that group of photos. In this grouping I added one of the November cut files by Irit, cut from one of the kits exclusive papers. And also I added an asterix thicker, exclusive ephemera, a Pink Paislee clip and small embellishments that provide that finishing touch, like the mirrored circles and Heidi puffy stickers.
  all-smiles-1

Here you can see the cluster to the left of the photo. The details tab is just there for an added embellishment, but yep, all the details are in the journaling.

  all-smiles-3

 I am a little addicted to adding these gorgeous Crate Paper tassels to every page I create. This one coordinated with my colour palette nicely and I was able to wrap and tie it to the star cut file.
  all-smiles-4

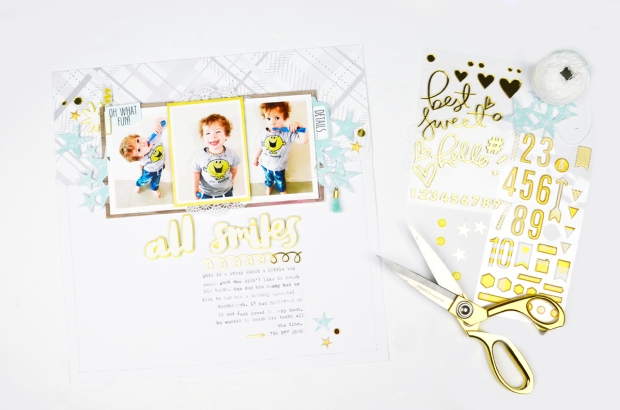
 I used my typewriter for my journaling and cut it out in strip form. I wrote in third person -a bit like a story for something different. To finish the journaling and help balance the page and reinforce the design idea of visual triangles, I added smaller embellishments to the bottom right of the journaling.
all-smiles-45

 I wanted the photo of my son and his big cheesy grin to stand out more than the other two photos so I matted it onto the yellow from one of the Pink Paislee papers and adhered it with foam tape to the page. The whole mat of photos on the woodgrain paper is also adhered with foam adhesive. it really helps those photos pop.
all-smiles-7

 I hope you have enjoyed this layout today and found it inspiring. It was fun to challenge myself to create a multi photo layout about my son from what predominately could be said to be a more girly themed kit.
  all-smiles-desk

Thanks for stopping by Raquel xx

Beautiful You, a fussy cutting layout using Moonstruck by Pink Paislee

Hey everyone, I'm here today sharing a layout all about fussy cutting, and boy, don’t we all have a love/hate relationship with this one! Sometimes I can see a paper and think I must cut out those hearts, stars, flowers, etc. But then I remember the time consuming nature of fussy cutting and the level of intricacy required and that deters me slightly from giving it a go. Do you sometimes feel that way too?

However, sometimes a paper design can win the ‘to fussy cut or not to fussy cut’ debate in my head and I give it a go. It is funny as more times than not when I fussy cut I love the result which then make me question why I don’t do it more often!?!

Here is the layout that I created:
Fussy Cutting: Fluttering Fussy Cutting @raquelLbowman @pinkpaislee #pinkpaislee #12x12 #layout #fussycutting #pptakemeaway

For today’s layout I decided to fussy cut and feature the gorgeous Paper 08 from the Moonstruck collection. The butterflies and the change in colour on them are just do gorgeous and I wanted to create a page that had these as a feature.

PP_Paper_Template
The story of this layout is of my little girl. She is four now and growing up far too quickly before my eyes. This was taken on her first kindergarten orientation. Where I live in Australia, this is a pre-schooling education that they attend for around 15 hours a week prior to their formal primary education. She is very ready to be going and was dressed up and so eager to go and meet her teachers and the other children.
Fussy Cutting: Fluttering Fussy Cutting @raquelLbowman @pinkpaislee #pinkpaislee #12x12 #layout #fussycutting #pptakemeaway
I love working with butterflies on scrapbooking pages as you can achieve a lot of dimension and detail when adhering them down. To do this I simply fold them in half and only apply the adhesive to the middle of the butterfly. To add some extra detail to the butterflies I added the Marble Gold Foiled Speciality Paper as a layer underneath. I simply cut the vellum the same size as the butterfly it was layered underneath. I love the pop of gold this brings depending on the angle that you are looking at the butterflies on.
Fussy Cutting: Fluttering Fussy Cutting @raquelLbowman @pinkpaislee #pinkpaislee #12x12 #layout #fussycutting #pptakemeaway
I wanted the butterflies to look like they were fluttering from the top of the photo. This can be achieved by changing the angles that the butterflies are positioned when they flow on the page.

Once I had started fussy cutting I think I had caught the bug and continued to fussy cut by creating a floral cluster to either side of the photo using Paper 02. I aimed to keep the floral elements around the same size so the photo area remained balanced.
Fussy Cutting: Fluttering Fussy Cutting @raquelLbowman @pinkpaislee #pinkpaislee #12x12 #layout #fussycutting #pptakemeaway
I really wanted to document this big moment in my little girls’ life so I chose one of the journal cards from the ephemera pack to add the story to. I did this using my typewriter directly onto the card. I then created a pocket to slip it into, so the journaling could be hidden.

Fussy Cutting: Fluttering Fussy Cutting @raquelLbowman @pinkpaislee #pinkpaislee #12x12 #layout #fussycutting #pptakemeaway
The title was added to the top right area within the butterflies. It is made up of the Moonstruck Thickers and the gold foiled ‘beautiful’ word from the ephemera pack. It nestled nicely within the fluttering butterflies.

Fussy Cutting: Fluttering Fussy Cutting @raquelLbowman @pinkpaislee #pinkpaislee #12x12 #layout #fussycutting #pptakemeaway
To balance out the title on the top right corner I added a small heart and sentiment label to the bottom left of the page on top of the floral cluster. To help ground the whole page and add a pop of colour I matted the layout on the Paper 12 from the collection.

Fussy Cutting: Fluttering Fussy Cutting @raquelLbowman @pinkpaislee #pinkpaislee #12x12 #layout #fussycutting #ppmoonstruck
I hope this page has inspired you to give fussy cutting a go. Stop by the blog tomorrow for a fussy cutting tutorial!

A Cocoa Vanilla Studio and Jot Magazine Collaboration

Hey everyone, I'm here today sharing a layout featuring the gorgeous Make a Wish collection. Did you know that in the December issue of Jot Magazine the Jot Girls and Cocoa Vanilla Studio collaborated to create a layout gallery full of beautiful projects featuring the Make a Wish collection?

Today I wanted to share with you an extra project that I created as part of the collaboration, and what better subject than a layout about some of the Jot team!

jotgirls

As a bonus today I have created a process video for this layout which you can watch below:


To create the main text on the layout I used my silhouette software to recolour the Jot Motto/tagline. I coloured it in a pink tone to compliment the collection.
jotgirls-5
The gorgeous florals and butterflies in the card stock and ephemera packs were perfect for embellishing either side of the photo.
jotgirls-2
I thought the camera from the sticker accessory sheet was the perfect match for the subject of memory makers and story tellers, as what we do is document memories via photos. I added more ephemera to the right side of the camera to help balance the layout.
jotgirls-3
The photo itself is printed approx. 3.5″ in size so that I could fit it within the pink ombre frame within the chipboard sheet.
jotgirls-4
I added simple layers of a doily from my stash and one layer of the floral patterned paper behind my photo. I added extra dimension to the photo area by adding a layer of foam sheet.
jotgirls-1
I hope this layout has inspired you today and you can see the versatility of the gorgeous Make a Wish collection.
jotgirls-desk

To see the collaboration between Jot Magazine and Cocoa Vanilla Studio you can check out the magazine by clicking the image below. *You may want to grab a cuppa and bickie, its a good read!*
sliderissue16
Raquel xx

Special Moments with the December Hip Kits

Hey everyone, I'm here today sharing my newest layout featuring the bright and colourful December Kits. For my layout today I have focused on creating a multi-photo layout which features the gorgeous exclusive floral cut file design by Bea Valint for HKC.

 Here is the layout I created:
special-moments-layout

The photo I am documenting is a series of photos taken when I took my little girl with me to our local nail salon. The ladies there were so lovely and offered to paint her nails too and she was so excited. She loves when I paint her nails at home, but getting them done out made it just that little more special. A Mummy-Daughter pamper outing together, how fun. I documented the story using my fave way - strip journaling typed on my typewriter. For the layout title I added the Amy Tangerine foam thickers sentiment moments, onto a scrap of yellow patterned paper from the Pink Paislee Take me Away collection. It adds that perfect pop of colour to the page and helps the white thickers stand out. The 'special' was added with the super cute silver glitter foam thickers.

  special-moments-1

I created a little cluster to the right of the photos that features some of the amazing Pink Paislee Take me Away ephemera, some of the Birthday Bash sequins and even the asterix from the Amy Tan thickers. To add some detail to this cluster I added some foam adhesive under certain pieces.

  special-moments-2

I added a small scattering of embellishments to the top left of the layout too, to help balance it. The little heart is punched from the American Crafts glitter tape using a tiny American Crafts heart punch. Whats great about the glitter tape is that it is adhesive backed, so once I punch the shape out I simply peel off the backing sheet and stick it to my page.

  special-moments-3

In this multi photo layout there was one photo which I wanted to stand out more than the rest. To help achieve this I printed it slightly larger than the other two and also backed it on the yellow - a brighter colour, to help it pop off the page more. I also adhered the photos on a foam adhesive which gives the photos that extra bit of dimension.

special-moments-4

 I hope this post has inspired you today and given you an idea for a multi photo layout using cut files.

special-moments-desk

Thanks for stopping by
 Raquel xxx

Exciting News ... Cocoa Vanilla Studio Team 2017

Hey everyone, I am super excited to share that I am continuing on as part of the Cocoa Vanilla Studio Design Team for 2017 along with these amazing ladies,
dt-layout_2017-copy

Cocoa Vanilla Studio – 2017 Design Team:


I am so excited to get to know these ladies better and continue to share my CVS projects with you 
SaveSave

Raquel x