A special mini album with Pink Paislee

Hey everyone, I'm here with you today sharing a mini album I created.

For my mini album today I decided to delve into my mini album stash and create a 4×4 Insta album using a gold We R Memory Keepers album I had and some of my favourite quotes, papers, and embellishments from the Oh My Heart collection. I am a big lover of quotes and have a Pinterest board full of ones that resonate with me. They’re sort of like a therapy tool really, when you see one that speaks to you they can either make you see the positive side to a situation, make you feel grateful for the blessings you have in your life, or even give you that pep talk that you need to pick you up when you feel down. As a mum, wife, and in my crafty and professional life, it can be all too easy to judge yourself harshly, compare yourself to others, and not give yourself enough credit. This album is a little token to remind me that I am enough, that I do deserve the love and recognition that I get, and to keep my spirits high when I am in doubt.

Here is the album that I created, I hope you find it inspiring:

Create a mini album full of love and positive affirmations on todays blog post. @raquelLbowman @pinkpaislee #pinkpaislee #minialbum #ppohmyheart

I will now share with you a few of the pages and some tips and tricks for how to create one of these albums at home.

The spine contains a sticker from the Sticker Book and I created some fun dangles using some tassels I had in my stash and one of the Oh My Heart charms.

Create a mini album full of love and positive affirmations on todays blog post. @raquelLbowman @pinkpaislee #pinkpaislee #minialbum #ppohmyheart
I wanted to create some consistency with my quotes, more so in the design of them, so I decided to turn towards an app that would be able to transform my text in a visually appealing way. The app that I used is Word Swag which is available in both the Apple and Google Play stores. I did buy this app and the text add ons, but for me to customise and create my own quotes it was well worth the few dollars, the equivalent to a cup of coffee here in Aus. I also added some of my favourite photos or sentiments from the Oh My Heart papers and embellishments.

The title page is made up of papers, ephemera, and a doily from my stash of supplies.
Create a mini album full of love and positive affirmations on todays blog post. @raquelLbowman @pinkpaislee #pinkpaislee #minialbum #ppohmyheart
I printed all my photos into 4×4 instagram size and in black and white. I love white borders around photos so I made sure to add them to these images. In between some of the pages I also added some vellum pages, or interactive elements. The page below contains a couple of ephemera and again a small doily from my stash.
Create a mini album full of love and positive affirmations on todays blog post. @raquelLbowman @pinkpaislee #pinkpaislee #minialbum #ppohmyheart
I love the translucent look to the vellum and it is so easy to create your own pages. Simply cut to a 4.5″ x 4″ piece and punch holes using a plastic sleeve as the guide.

Create a mini album full of love and positive affirmations on todays blog post. @raquelLbowman @pinkpaislee #pinkpaislee #minialbum #ppohmyheart
I kept the embellishing in the album relatively simple. The quotes themselves are quite clean so the more simplified style of embellishing works better in this instance.

Create a mini album full of love and positive affirmations on todays blog post. @raquelLbowman @pinkpaislee #pinkpaislee #minialbum #ppohmyheart

The quotes on the foiled speciality paper were perfect as a feature on a page too.

Create a mini album full of love and positive affirmations on todays blog post. @raquelLbowman @pinkpaislee #pinkpaislee #minialbum #ppohmyheart

I just had to create a shaker pocket page. I used the Birthday Bash sequins to play inside the pouch I made.

Create a mini album full of love and positive affirmations on todays blog post. @raquelLbowman @pinkpaislee #pinkpaislee #minialbum #ppohmyheart

The clips from the Take Me Away collection came in handy when pulling together this album.

Create a mini album full of love and positive affirmations on todays blog post. @raquelLbowman @pinkpaislee #pinkpaislee #minialbum #ppohmyheart

Sometimes the ephemera pieces can be an insert of their own, like this one below.

Create a mini album full of love and positive affirmations on todays blog post. @raquelLbowman @pinkpaislee #pinkpaislee #minialbum #ppohmyheart

The quotes I used were all found on google or pinterest and typed into the app I mentioned above. They all had a special significance to me and how I may be feeling. I love that I will have all these positive affirmations in the one place, including treasured photos of my family.

Create a mini album full of love and positive affirmations on todays blog post. @raquelLbowman @pinkpaislee #pinkpaislee #minialbum #ppohmyheart

This album and the theme was a great chance to get that fox ephemera used up.

Create a mini album full of love and positive affirmations on todays blog post. @raquelLbowman @pinkpaislee #pinkpaislee #minialbum #ppohmyheart

I hope you have enjoyed my post today!

Create a mini album full of love and positive affirmations on todays blog post. @raquelLbowman @pinkpaislee #pinkpaislee #minialbum #ppohmyheart

Most Favourite - A spring inspired layout with Pink Paislee


Hey everyone, I'm here with you today sharing a layout as part of Spring Break week on the Pink Paislee blog. Being in the southern hemisphere we are currently in the season of Autumn/Fall so I’m going to do a little creative interpretation of this theme. When I think of spring I always think of blue skies and beautiful florals and that is what inspired this layout I am sharing today.

I was recently given a bunch of flowers from my daughter and mother ‘just because’. I took a photo of those flowers because I wanted to document how such a simple gesture can brighten someone’s day when they might just need it most. Here is the layout I created:

Visit the blog today to see Raquel's Spring inspired layout. @raquelLbowman @pinkpaislee #pinkpaislee #springbreak #12x12 #ppohmyheart
I was inspired by this cut file by Wilna Furstenberg. It had been a design I had been wanting to use for a long time but had never quite found the perfect page for it. I thought this would be the perfect opportunity to use it.

Paper 21 was the perfect addition to the floral cut file as the paper mimics kitchen and home counter tops. I decided to cut out the counter top with lots of the purple colour in it as my flowers also had a shade of purple within them. The vase rests perfectly on top of it.

raquelbowman-springbreak-april4-blog2
I fussy cut around the icons that were on the same strip of paper. To add some extra detail I added some foam adhesive behind the spoon tops to pop them off the page a little. I also added some of the stickers from the sticker booklet to this area too.

Visit the blog today to see Raquel's Spring inspired layout. @raquelLbowman @pinkpaislee #pinkpaislee #springbreak #12x12 #ppohmyheart
To back the cut file itself I used the smaller prints in the 6×6 paper pad. This allowed me to add detail to the leaves as the prints were a much smaller design. I added some of the Oh My Heart ephemera and fussy cut flowers around the vase area too.

Visit the blog today to see Raquel's Spring inspired layout. @raquelLbowman @pinkpaislee #pinkpaislee #springbreak #12x12 #ppohmyheart
The title of this page actually comes from the Fancy Free puffy sticker pack, ‘most favourite’. When I was looking through my supplies and I saw this I knew it would be perfect. It complements the colours well and it’s the perfect sentiment too.

raquelbowman-springbreak-april4-blog5
I couldn’t resist adding another row of cups from the sticker booklet to the counter top. I also remembered that the Take Me Away ephemera had a canister set die cut, so I added that to the page too, why not right?!?

Visit the blog today to see Raquel's Spring inspired layout. @raquelLbowman @pinkpaislee #pinkpaislee #springbreak #12x12 #ppohmyheart
For my journaling I have typed it up and cut it into strips. I love the look of typed journaling. For something different, I adhered it vertically against my photo.

Visit the blog today to see Raquel's Spring inspired layout. @raquelLbowman @pinkpaislee #pinkpaislee #springbreak #12x12 #ppohmyheart
Thanks so much for stopping by the blog today, I hope that this ‘spring’ layout has inspired you!

Visit the blog today to see Raquel's Spring inspired layout. @raquelLbowman @pinkpaislee #pinkpaislee #springbreak #12x12 #ppohmyheart

Bunny Love with 'Oh My Heart' Pink Paislee


Hey everyone, I'm here with you today sharing a layout as part of Easter week here on the Pink Paislee blog. For this layout I was inspired to scrapbook a series of photos of my daughter in her bunny ears last Easter using the Oh My Heart collection.

Each Easter here in Australia it has become a bit of a tradition in daycares, kindergartens, and schools to have an Easter Bonnet parade. Our hats tend to be decorated more so with bunnies, chickens, and eggs, rather than spring flowers as our Easter falls during the season of Autumn here. Last year was the first year my daughter has taken part in this event so I decided to modify some bunny ears for my daughter by adding eggs and I couldn’t resist adding some pretty florals too. They turned out sooo cute! The bunny ears inspired the layout design and I decided to recreate a bunny head at the bottom of my layout and embellish it with florals and other fun embellishments.
 @raquelLbowman @pinkpaislee #pinkpaislee #easter #12x12 #ppohmyheart


I matted the three smaller photos with some of the 6×6 patterned papers and arranged them on the page in a grouped design.

What is more Easter themed than an Easter Bonnet inspired layout? Check out Raquel's bunny-lovin' layout. @raquelLbowman @pinkpaislee #pinkpaislee #easter #12x12 #ppohmyheart
My title ‘bunny love’ is using the Thickers which are adhered in an overlapped fashion. I decided to try my luck and stitch through the centre of each word. I was unsure how my sewing machine would handle the double layers in parts but it worked and was fine. I really love the look of how they overlap each other.
What is more Easter themed than an Easter Bonnet inspired layout? Check out Raquel's bunny-lovin' layout. @raquelLbowman @pinkpaislee #pinkpaislee #easter #12x12 #ppohmyheart
I really wanted to replicate the floral headband onto my page. These florals are mainly fussy cut from papers, only a few pieces were actually from the ephemera pack. I used a variety of foam adhesives to add a lot of detail and dimension to the layout.
What is more Easter themed than an Easter Bonnet inspired layout? Check out Raquel's bunny-lovin' layout. @raquelLbowman @pinkpaislee #pinkpaislee #easter #12x12 #ppohmyheart
I added some more machine stitching to the bunny head itself and also around the edge of the page for added texture. Foam adhesive under the bunny head also helps it to pop off the page even more and create such a visual impact.

What is more Easter themed than an Easter Bonnet inspired layout? Check out Raquel's bunny-lovin' layout. @raquelLbowman @pinkpaislee #pinkpaislee #easter #12x12 #ppohmyheart
I had so much fun creating a playful Easter page. Thanks for stopping by!

Scrap lifting Missy - Cocoa Vanilla Studio

Hey everyone, I'm here with you today sharing my latest layout using the Wild at Heart collection. This week on the Cocoa Vanilla blog is Scraplift week - where the design team is to choose another team member to scrap lift. For my layout I decided to choose a team member whose style is very different to mine, so I chose mixed media queen Missy and decided to have some messy play!

Here is the layout I created:


And here is Missy's amazing layout:


I decided to follow the main layout design and used the one photo and vertical design of the 'xo' cut files from the Colour me Happy cut file set available in store.

I printed my photo in black and white slightly smaller than 4x6 in size and created three main clusters. For the first cluster I added a doily, some of the stickers and ephemera pieces. I also added one of Missy's go to techniques of adding some messy thread underneath a flair button.

I also added a cluster to the right of the page, near the largest 'xo' cut files. This time as well as the stickers and ephemera, I also added the chipboard 'wild at heart circle' to repeat the circular element from the previous cluster.


The subjects of this layout is my hubby and son. I wanted to add some simple journaling just documenting my love for them. As always, I added typewritten journaling in strip form.


The final main cluster is at the bottom left of the page. I kept this one a lot more simple than the previous two. I also added some of the tiny word stickers to the page and like Missy's sample, I added some machine stitching detail to them.


The background itself was created by first adding a thin coat of clear Gesso. This helps when applying liquid and inks as the colour will not just seep in. Once the gesso dried I applied the distress ink to clear packaging and some water, and smushed it over the background. This technique is known as the 'packaging technique', a tried and well tested technique used a lot by Missy.


I chose a blue/grey distress ink colour as I wanted a more soft watercolour background look. To add further detail to the 'xo' pieces I added some machine stitching. Foam tape added some extra dimension to the main 'xo' pieces to help them stand out off the page even more. I also backed the largest cut files from the page on a floral patterned paper.


I hope you have enjoyed my contribution to the Scraplift week. Thanks for stopping by!


Raquel xxx

Sizzix - Latest projects from Chapters 1 & 2 Releases


Hey everyone 

I'm here today to share a couple new projects created with new release Sizzix Dies from Chapters 1 and 2. 

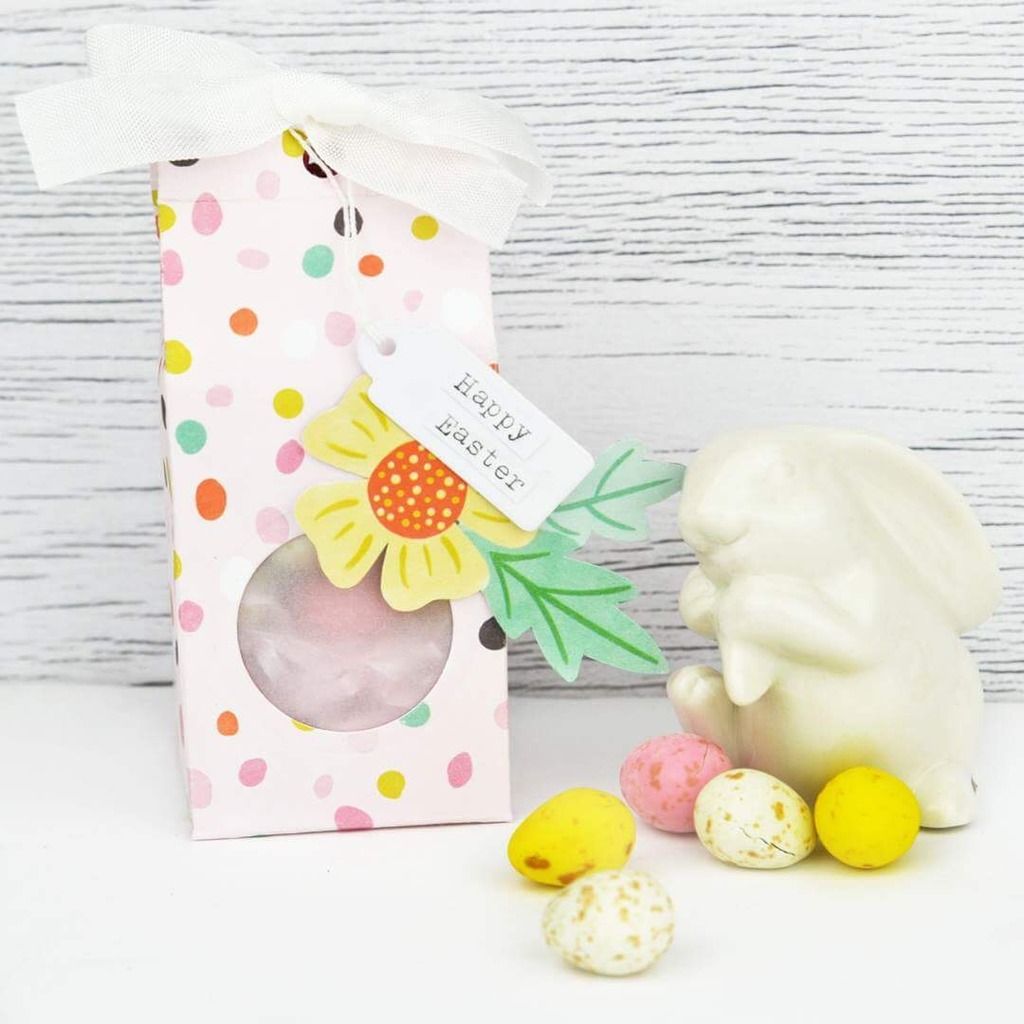
Before I begin I hope you had a lovely Easter. I created a fun little gift using the Milk Carton die (658823) and the Pink Paislee Oh my Heart collection. 


You can see how this came together in this quick video that I put together:


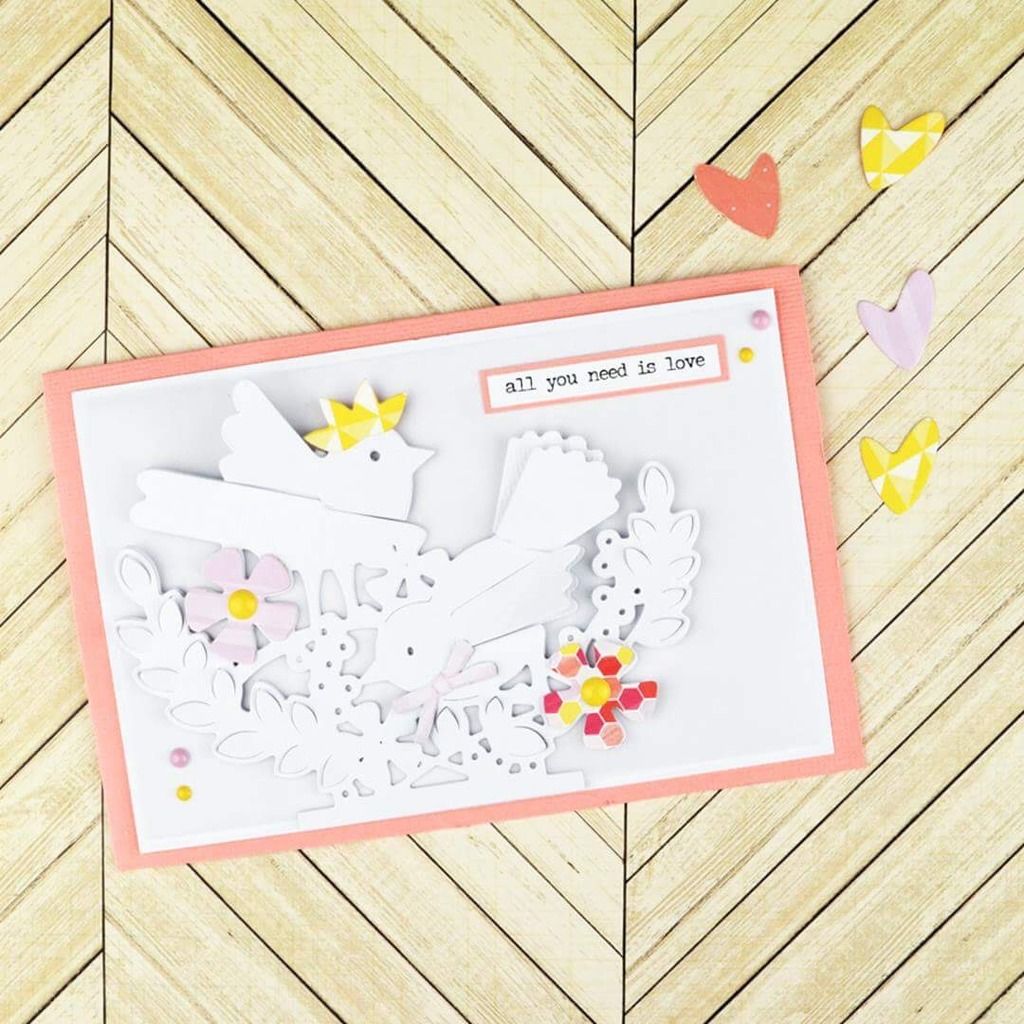
Next I have a gorgeous card for a special someone or even a couple. This one is featuring the new Chapter 2 releases; Interlacing Birds 662101 and Cacti 661700, and using the Take me Away collection by Pink Paislee. I love how the interlacing dies give so much depth and dimension!

I was able to add foam tape under some parts to help pop it off the page more. I also created a cute crown from the Cacti set and fussy cut a bow from one of the Pink Paislee papers. 


Finally I will share with you a layout I created, I used the 'doily mask' and 'mini detailed butterflies' dies. I also delved into the gorgeous Sophie kit from Felicity Jane that was perfect for documenting this photo of my little man and I.


I loves the 'doily mask' die as soon as I saw it and thought it would be a beautiful and detailed addition to a page. It was able to border my photo beautifully. 


The 'detailed butterflies' die is so intricate and pretty, a great staple die for a stash. I mean who doesn't love butterflies?


The Felicity Jane kit gave so many cute elements that could be cut out. I also stamped my title, something I am doing a little more often lately. 


Thanks so much for stopping by my blog today. 

I'll be back soon with some more creating 
Raquel x

No adhesive Gallery - Jot Magazine Issue 17

Hey everyone,

Today I am sharing with you my Jot Magazine layout for the no adhesive gallery. Excitedly, this one also made the cover!


When first given this gallery theme I was a little stumped and wondered how I could possibly make a layout without adhesives. It is no secret that I love my adhesive foam tapes and well any kind of adhesive, after all they secure our pages together right!?! However, once I had a layout design in mind, the rest kind of fell together and I really enjoyed the process.

Here is the layout I completed:


Finding boy collections to scrapbook with can be super hard. Thankfully I came across the funky Bella Boulevard 'Alex' and 'Oh My Stars' collections. They are perfect for documenting photos of my little man. All of the little icons and sentiments were perfect and I had to stop myself from adding things as I went a little layer crazy on this one!

For my journaling I just wanted to document a little bit about my little mans personality. To secure the journaling to the page I just stitched it through the center. This meant I could add some dimension by folding the ends inwards. 


To secure my banner layers to the page, I ran two pieces I wire horizontally along the top. This wire was from my stash and purchased from D-lish Scraps. I then was able to use paper clips and pegs to secure the banners. I then gathered embellishments like die cuts that I thought would look good on the page and arranged them to the left and right of the layers. Once I was happy with their placement I added staples to secure them to the page. Can I say that I fell back in love with my tiny attacher while creating this page, its the perfect look to a masculine page. All the sentiments in the Bella Boulevard packs were just perfect. 


To secure my photo to the patterned paper may I used staples. I then embellished it with a peg, a binder clip and a cute little tab. 


I hope you have been inspired by this layout today. Don't forget to pop on over to Jot Magazine to see the latest issue, issue 17. 

Raquel x

Altenew’s 3rd Anniversary Blog Hop + Giveaway


Hi everyone,

I'm super excited to be participating in day one of Altenew's 3rd Anniversary Blog Hop, thanks for inviting me May! After your stop at Yoonsun Hur's post, its now my turn to give you some Altenew inspiration.

To create my layout today I used the Painted Garden Ink and Stamp bundle and papers and embellishments from Altenew's Reflections scrapbook kit.

Here is the layout I created:


I decided to document another moment from my wedding album. This time, one from just before getting into the car to head to the ceremony, my bridesmaids helping me with those final touches before we were on our way. 

I stamped two of the Painted Flowers floral pieces to create my own floral embellishment die cuts for my page. Now I am someone who has NEVER stamped in layers before, and boy! these Altenew sets are a breeze to use. I followed the layering guide which I printed from the store, and used the inks included in the bundle. I just love the result and feel the finished result looks a lot more complex than it was. I'm in love! I do not have a special card stock to stamp on so I have simply used some flat white card from my stash and then fussy cut around the images. 


I also fussy cut some of the florals from one of the papers in the Reflection kit. I wanted to add a pop of contrast and these were perfect and tied in with the floral theme. The journaling is typewritten and short and sweet, but conveys what I need it to. 


Due to so much happening at the top left of the page, I decided to add a cluster to the bottom right. I used the second stamped image and also some of the embellishments from the Reflections kit.


I hope you have enjoyed my contribution to the hop! Keep reading to see how you can join in and win some amazing prizes. 


What's up for grabs?
Altenew is giving away $50 gift certificates to FIVE lucky winners. There are also 12 awesome companies who are celebrating with us, and they are offering the following prizes:

Spellbinders: Three $100 Gift Certificates
Online Card Classes: Three Class Spots
My Sweet Petunia : Mini MISTI
Pretty Pink Posh : $30 Gift Certificate
WOW! Embossing Powder : $30 Prize Pack
Scrapbook Adhesives by 3L : $30 Prize Pack
Tombow USA: 1 pack of 10 Dual Brush Pens
Chameleon Pens: 1 Pack of 5 Chameleon Pens
Butterfly Reflections Ink: $25 Gift Certificate
Ellen Huston LLC : $25 Gift Certificate
Freckled Fawn : $25 Gift Certificate
Simon Says Stamp : $25 Gift Certificate


Amazing right!

Blog Hop Order for Day 1 of the Altenew Anniversary Hop: 

Altenew

Laura Bassen

Ashley Horton

Amy Lee

Simon Says Stamp

Sveta Fotinia

Taheerah Atchia

Anna Kossakovskaya

WOW! Embossing Powder

Yoonsun Hur

Raquel Bowman - YOU ARE HERE

Marika Rahtu

Nina Marie Trapani
Be sure to leave comments by Tuesday, April 25, 2017 at 11:59 PM EDT for a chance to win! 21 WINNERS will be chosen at random from the comments left on any of the blogs listed above and will be announced on the Altenew blog on April 28th, 2017.

****

Your next stop is Marika Rahtu, happy hopping and thanks for stopping by!