Happy Memories with the May Hip Kits


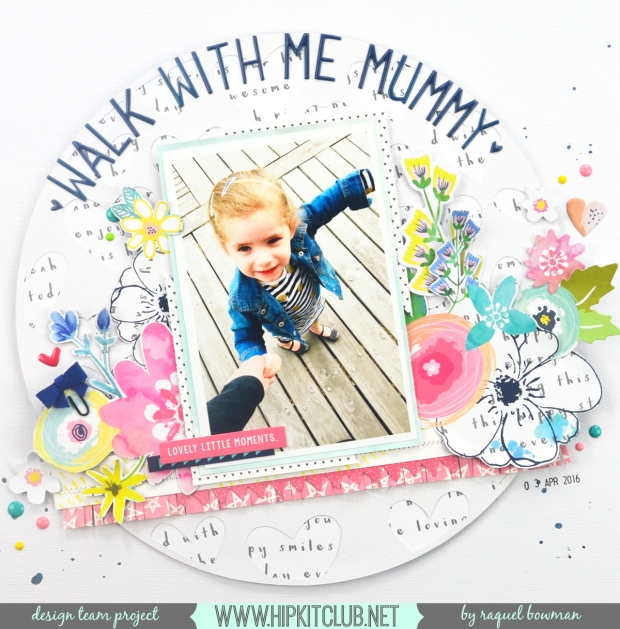
Hey everyone, I'm here with a new layout using the May kits which arrived on my door step earlier this week. I couldn’t wait to get stuck into these kits and begin creating. But before I started creating, I shared an unboxing video on YouTube which went through the contents of the kits in detail. You can see it here

I brought a new storage system for my kits last week after seeing many recommendations via various Facebook groups. I have found storing my kits a constantly changing system but I think I have finally found one that works for me. Similar to the iris cases easily available in the USA these Really Useful 7 litre boxes come with a tray and a big enough to fit all the papers, including the extra paper and card stock. They are available from Officeworks in Aus and Amazon for all those out of Australia. Its the little things in life that can make a girl happy, and boy this new scrapping storage system brought a smile to my face. On the below video I share with you how I ‘unpack’ my kit into the storage case in readiness for cropping and creating!
Once I was all organised I was ready to create! Today my layout features some photos I had taken of my kiddies when we went to the park recently and the May exclusive cut files designed by Kim Watson. Of course I chose to cut the frame on white card stock. I just adore that white on white look and find that if I add dimension to the cut file with some foam adhesive it creates a shadow and therefore helps to distinguish between the background and the cut file.
happymemories
When embellishing the layout I used a lot of the May kit exclusives designed by Kim Watson. I didn’t do that consciously but I seriously just love every piece and want a few packs of each exclusive (including the papers)! The cluster below is made up of exclusive ephemera and puffy stickers, Jillibean Soup wood veneer and adhesive sequins and the Echo Park enamel dots. By adding some to the die cut with foam I was able to create even more dimension.
happymemories-1
This cluster to the top left of the page was again made up of the same combination. I backed the two square frames with one of the exclusive blue patterned papers. I also added a small strip of the beautiful illustrated faith washi tape.
happymemories-2
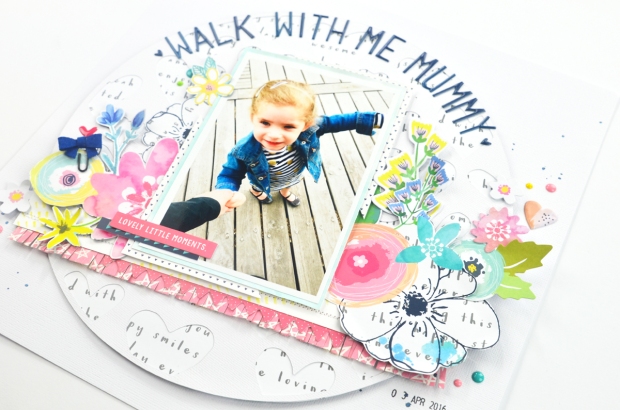
To print my photos to fit within the frame I simply measured the frame space and in the Photos app on my mac created custom size prints. For example the bottom rectangular frame I printed 3×3 and cut off any excess before adhering it to the back of the cut file. happymemories-3
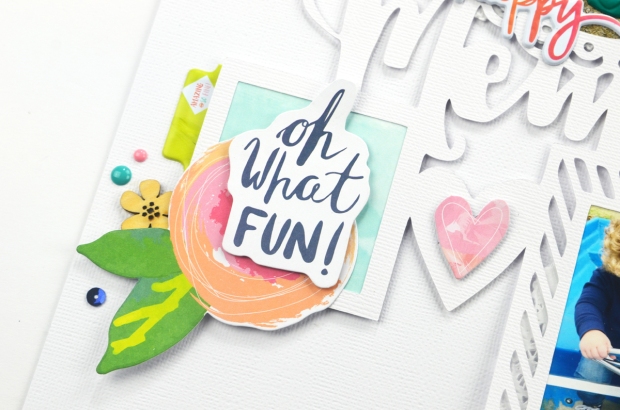
The puffy stickers included in the kits are another exclusive which is designed by Kim Watson. I decided to build on the ‘memories’ title within the cut file and add ‘happy’ to it from the stickers. The balloon is meant to look like it is part of the title and signifies the beginning. I couldn’t resist adding one of those super cute mini bow clips to the top of the frame too. I need a gazillion of those!happymemories-4
I had the loveliest time playing with these kits. The contents of them each and every month makes it so easy to create layouts.
happymemories-youtube
I decided to also share a card with you today that I created using the light kraft card stock from the card stock add on and the papers and embellishments within the kits. I wanted to keep the card simple and created it featuring lots of the Jillibean Soup papers and embellishments scattered throughout the kits.
justtosayhellocard-logo
Here I used the mini placemats as a main feature, and also cut out the’ just a little hello’ sentiment from one of the cut apart papers. I also embellished with the wood veneer from the veneer pack and some enamel dots. justtosayhellocard-1
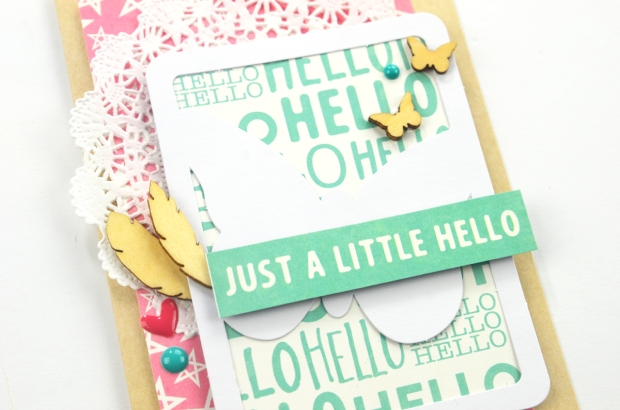
Thanks for stopping by my blog today. 

Raquel xxx

Krafty cards using the Pink Paislee Outfitters collection


Hey everyone, I'm here today sharing a couple of cards that I made for Outfitters week on the Pink Paislee blog. I have decided to share and create a different style card to my usual, using the new Outfitters collection. 

This collection has so many fun icons but also a really beautiful colour palette. I was definitely drawn to the navy, blue, and coral tones from the collection for these cards. Because of the tones within the collection I decided to be a little daring for me and use kraft cardstock as my base.
Outfitters: Krafty Cards @raquelLbowman @pinkpaislee #pinkpaislee #ppOutfitters #cards #masculine
The two cards I have created are certainly more aimed at a male recipient, I was actually thinking they would be perfect to pop away in my card stash for Fathers Day.
Outfitters: Krafty Cards @raquelLbowman @pinkpaislee #pinkpaislee #ppOutfitters #cards #masculine
For the first card I focused mainly on paper 04 (310336). I love the starry print on the navy background and wanted to feature that pattern. I then used a strip of the reverse side which has a beautiful blue and navy pattern to break up the design between the navy and white.
Outfitters: Krafty Cards @raquelLbowman @pinkpaislee #pinkpaislee #ppOutfitters #cards #masculine
For the embellishments, I added a tag from the ephemera pack (310347). This was where I decided to apply a cluster of embellishments. I adhered a copper and navy frame, the caravan (on foam adhesive) and the ‘better together’ sentiment. The navy stickers from the sticker booklet (310362) were the perfect finishing touch to the card. I also added some string to the top of the tag which added a little texture and a doily.
Outfitters: Krafty Cards @raquelLbowman @pinkpaislee #pinkpaislee #ppOutfitters #cards #masculine
I used a different approach for the design of the second card although I still used kraft cardstock as a base. I used 3 x 1.5″ squares of paper 04 (310336) and added 3 x 1.5″ square of paper 12 (310344) in a grid design on top of an extra piece of kraft cardstock. I added a pop of white underneath that piece to the top left and bottom right corners.
Outfitters: Krafty Cards @raquelLbowman @pinkpaislee #pinkpaislee #ppOutfitters #cards #masculine
To embellish the card I simply wrapped some string around it and secured it at the back in a knot. I used the ‘wonderful day’ sticker from the sticker book to add a sentiment to the card. This was from the white sticker sheet, so to help it stand out I adhered it to kraft cardstock and fussy cut it out.
Outfitters: Krafty Cards @raquelLbowman @pinkpaislee #pinkpaislee #ppOutfitters #cards #masculine


To finish the card I added a couple more white stickers to the card and adhered the grid design piece to the card with foam adhesive.

I hope you have enjoyed seeing all the Outfitters posts so far this week. Isn’t it amazing how very versatile this collection is?!
Raquel

Walk with me Mummy - May Hip Kits


Hey everyone, I'm here today with another layout using the May kits. My theme was to supersize it, so I have decided to show you how you can use the background cut files on both a layout and a card.

The photo in my layout was taken while my little girl and I were holding hands walking on a Sunday outing together as a family. I love that she loves holding my hand and so I just had to stop and snap a picture. I haven’t added any journaling to the page, but I was thinking I may record a few feelings on the back of the layout before I pop it into an album.

walkwithmemummy
As you may have noticed this layout is made up of A LOT of Hip Kit Club exclusives. I really just can’t get enough of them this month! The majority of the florals on this page were fussy cut out from one of the papers. I then further embellished with a couple of exclusive ephemera, a Bella Boulevard Bow and some enamel dots by Echo Park Summer Party collection. 

walkwithmemummy-1
I added the date the photo was taken using a roller date stamp in my stash and some black ink. I wanted to add a little more detail to the strips of paper on the layout. I used the strips of paper as a way to ground my photos and groups of embellishments to the layout. I used my fringe scissors and cut a fringe along it to add the detail I was after. 
walkwithmemummy-2
The floral pieces were fussy cut from the exclusive paper designed by Kim Watson. In doing this fussy cutting I came to the conclusion that I need to invest in some appropriate fussy cutting scissors! I layered in a few of the exclusive ephemera into this cluster too. And a cute puffy sticker heart!
walkwithmemummy-3
I am always a scrapbooker who leaves the title to last. Sometimes while creating I have absolutely no idea where I might place a title. It is always one of the most challenging parts for me. I knew I wanted to have a title similar to what I have used, but it can be so hard sometimes choosing where to place it as you still want to have a balanced layout design. I ended up wrapping it around the circle of the die cut background designed by Ashley Horton. 
walkwithmemummy-4
This layout sure is multi dimensional; there is foam under the background, under the photo mat and under the ephemera pieces. 
walkwithmemummy-5
Wow, these florals in the kit sure do just make me smile! 
walkwithmemummy-6
Now onto the card! As I mentioned earlier, I have created a card where I have used the same background cut file but shrunk it down to around 4×4″ in size. I then backed it on some patterned paper, added a couple of paper layers and mounted in onto a card base made from the butter card stock in the kit. 
happycard
The embellished details are mainly the Jillibean Soup veneer and hip kit exclusive ephemera. 
happycard-1
I hope this post today has shown you how versatile the background cut files can be! Thanks for visiting!

Raquel Bowman

Stencils Gallery - Jot Magazine Issue 14

Hey everyone, today I am here to share another one of my layouts for the Issue 14 of Jot Magazine. 

Issue 14 of Jot Magazine can be read by clicking on the image below 


The gallery was the stencil gallery. I chose to create a subtle stencilled background for my layout using my favourite whipped spackle by Faber Castell and a Crafters Workshop stencil 

Here is the full layout; I have used the gorgeous Fancy Free designer collection by Pink Paislee. I love that this collection is bright and fun and suits boy themed layouts too!


These photos were taken of my little man at the park, he was looking so grown up!

The High Five was cut from one of the 3x4" cut apart cards. It made a cut little feature on the page. The dimensional stickers are the perfect addition and all the hard work of layering and stitching is done for you! 

You can see the swiss cross stencilled background in detail below - I love the white look of the whipped spackle:

The puffy sticker cloud was the perfect place to pop my date. 

I love being able to tell our stories through my scrapbooking layouts My typewriter makes this process quick and I love the way it looks!


Thanks for stopping by today 
Raquel xx

My True North - a layout using Outfitters by Pink Paislee

Hey everyone, 

I'm here with a layout to share with you featuring the new Outfitters collection that I completed for Fathers week on the Pink Paislee blog.

@raquelLbowman @pinkpaislee #pinkpaislee #ppOutfitters #fathersday

When thinking about and planning this layout I was really inspired by a phrase I saw within the Outfitters collection. I found it on the papers, puffy stickers, and ephemera, and it gave me the inspiration for this design.

The quote was ‘find your true north’ …

Fathers: True North @raquelLbowman @pinkpaislee #pinkpaislee #ppOutfitters #layout #12x12 #fathersday

This quote spoke to me in so many ways and made me reflect on how amazing my husband is as a man and as a father. The journaling reads:

Before you I was lost, with you I know where my compass is pointing and it always leads me to you. You are an amazing husband but an even more amazing father to our two children. We are blessed to have you, you are our true north.

The quote and thoughts about my husband and the father to my kiddies led me to this compass design. I found this compass cut file in the Silhouette Store and cut it from white cardstock. I used paper 04 (310336) and paper 02 (310334) to back the cut file design. I wanted to stick to the blue and grey tones on the page and add in pops of the copper through the embellishments.

Fathers: True North @raquelLbowman @pinkpaislee #pinkpaislee #ppOutfitters #layout #12x12 #fathersday
The photo I am documenting on this layout was one taken when we went out one day as a family to our local waterfront area. I just love capturing moments like this from our lives. This photo honestly just melts my heart as it really just encapsulates what a great daddy he is. I did add a small pop of a doily to either side of the photo just to add a small layer. The entire 4×6″ black and white photo is also matted on paper 11 (310343).
Fathers: True North @raquelLbowman @pinkpaislee #pinkpaislee #ppOutfitters #layout #12x12 #fathersday
The title ‘true north’ was created with the Outfitters Thickers (310346). I wanted the title to work in nicely from the design without detracting from the main focus of the photo. Curving the letters around the cut file helps to draw your eyes back up and into the main focus.

Fathers: True North @raquelLbowman @pinkpaislee #pinkpaislee #ppOutfitters #layout #12x12 #fathersday
I decided to do some embellishing on a diagonal direction. I wanted to keep the layout balanced as the main design is central and circular. By embellishing and adding journaling on the diagonal it helped to balance the page and didn’t create a ‘top heavy’ or ‘bottom heavy’ design.

Fathers: True North @raquelLbowman @pinkpaislee #pinkpaislee #ppOutfitters #layout #12x12 #fathersday
The top cluster contains a variety of elements from the collection including ephemera and puffy stickers and copper stickers from the sticker booklet. To add dimension I adhered some with varying depths of foam tape.

Fathers: True North @raquelLbowman @pinkpaislee #pinkpaislee #ppOutfitters #layout #12x12 #fathersday

The bottom right corner is where I decided to add my journaling and a couple of smaller embellishments to keep the page balanced. By balanced I generally work in the ‘visual triangle’ method on all my pages. I guess it is one of my ‘go to’ things in terms of design.

Fathers: True North @raquelLbowman @pinkpaislee #pinkpaislee #ppOutfitters #layout #12x12 #fathersday
As you can see from my layout, the Outfitters collection does not need to limit you to camping and adventure photos! I have a feeling that I am going to be able to scrapbook a multitude of events and moments from our lives using it.

Raquel xxx

Triangles and Fancy Free - Pink Paislee


Hey everyone,

I'm here today sharing a layout featuring Triangles. For this layout I used the Fancy Free collection and it features one of the Paige Kits geometric design die cuts. I wanted to document these selfies that were taken with my son. He was making the cheekiest little face and I knew I wanted to document them as soon as we took them. He has recently taken a liking to selfies and I think it is because he can look at himself in the reverse phone camera.

Triangles: Best Ever Layout @raquelLbowman @pinkpaislee #pinkpaislee #ppfancyfree #scrapbooking #12x12 #paigekit
   
 The geometric design die cut from one of the Paige kits caught my eye as soon as I saw it. I love the design and was trying to figure out a way to manipulate it to suit this theme. There are a lot of triangles in the design which then led me to back each triangle with a bright paper in the collection. This process was mighty time consuming but totally worth it.
bestever-1
   

 Each triangular piece was  individually traced onto a patterned paper and cut out. The piece was then adhered to the back of the die cut piece. I just adore how it turned out. I was able to use the painted circles with text paper and feature some of those sayings on the layout, like the 'most favourite' triangle below. 


Triangles: Best Ever Layout @raquelLbowman @pinkpaislee #pinkpaislee #ppfancyfree #scrapbooking #12x12 #paigekit


 I added a cluster to the bottom left of the photo featuring the floral piece from the chipboard sheet and two labels from the Paige Kit. I matted my photo on one of the patterned papers and added some stitching for detail.

Triangles: Best Ever Layout @raquelLbowman @pinkpaislee #pinkpaislee #ppfancyfree #scrapbooking #12x12 #paigekit
     

 The Glitter thickers in the collection added a nice pop of colour to the layout and suited the layout perfectly.

Triangles: Best Ever Layout @raquelLbowman @pinkpaislee #pinkpaislee #ppfancyfree #scrapbooking #12x12 #paigekit
   

 Because the die cut is hollow in parts I simply added a little extra adhesive to where the 'best ever' thickers hit the solid lines. I love how the 'heck yes' triangle is reiterating my title too!

Triangles: Best Ever Layout @raquelLbowman @pinkpaislee #pinkpaislee #ppfancyfree #scrapbooking #12x12 #paigekit


    The journaling is short on this layout but is straight to the point and tells exactly what I wanted it to. I adhered the typewritten journaling to one of the tags from the collections tag pack. The arrow is from the chipboard sheet and used to draw your attention to the journaling.

Triangles: Best Ever Layout @raquelLbowman @pinkpaislee #pinkpaislee #ppfancyfree #scrapbooking #12x12 #paigekit
 

 I felt like the series of three photos needed something to ground it to the layout. The die cut piece is so bright and busy that it was a long process for me to figure out the placement of the photos. I cut a 4.25" piece of vellum and cut a fishtail into either end and adhered it on a diagonal. This softened some of the bright triangles and helped me anchor my photos to the page. I also added another strip of the yellow striped pattern paper for this same purpose.

Triangles: Best Ever Layout @raquelLbowman @pinkpaislee #pinkpaislee #ppfancyfree #scrapbooking #12x12 #paigekit
   

 As you can see in the image below, there is a lot of dimension on this layout. This is because the whole die cut piece was adhered to the page with the foam dots in the Paige kit and some extra ones from my stash.

Triangles: Best Ever Layout @raquelLbowman @pinkpaislee #pinkpaislee #ppfancyfree #scrapbooking #12x12 #paigekit
   

 Have you been having fun with the Fancy Free collection like I have been? It is arriving into lots of stores around the world and it has been so inspiring to see everyones creations with it!

Raquel x