
Hey everyone, I'm here today sharing my first layout and a tag created using the June kits. These kits are just so beautiful and as always that first layout is a little tricky as you have to choose what you will use when there is so much fun choice.
For my layout my focus this week was to ‘focus on the photos’.I have decided to create a layout based on the July Sketch. As soon as I saw this sketch by Ashley I knew I wanted to play along too! I loved that the arrowheads dictate and lead your eye towards the focus. Your focus is certainly on the photos in a design like this.
Here is the July Sketch by Ashley.

And here is my layout ‘Happiness Together’ featuring the June Kits. The photo was very dominated with yellow and orange with pops of pink so the Simple Stories Sunshine & Happiness Papers teamed with Kim Watsons exclusive papers were the perfect compliment.
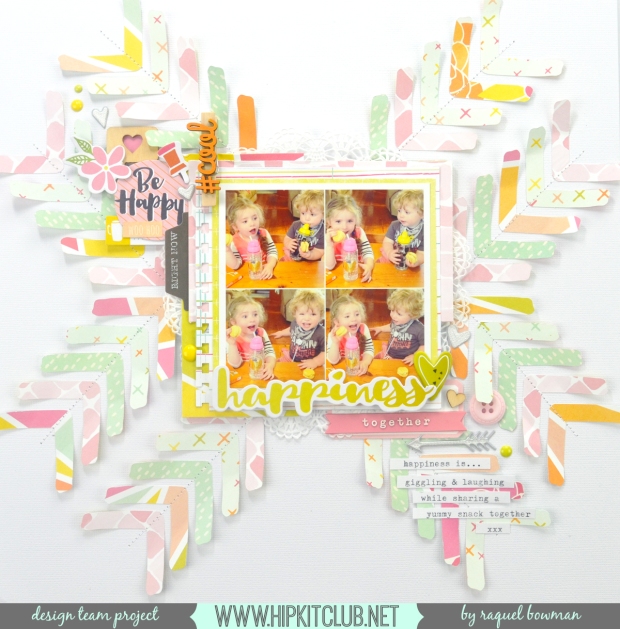
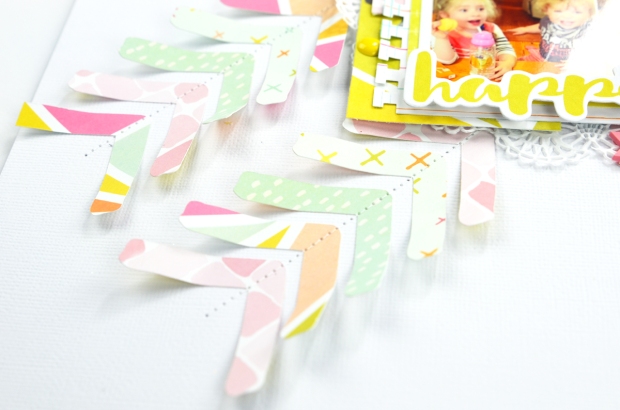
I love the effect that only securing the arrowheads with a light dob of glue in the centre of each one and finishing with machine stitching brings. If you fold each end inwards it brings about such dimension.

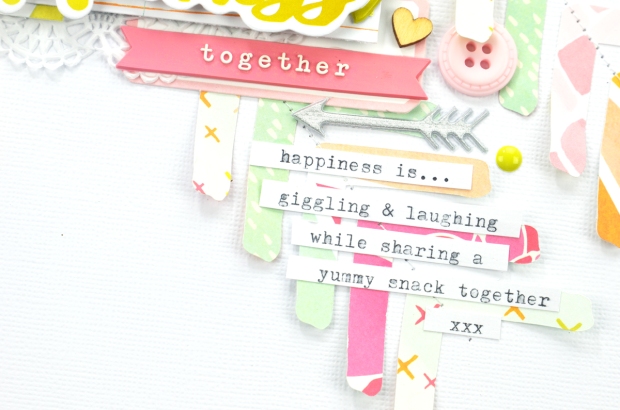
I added some journaling along that bottom right diagonal using some white paper and my typewriter. I found that if I placed the journaling any where else if was off balancing the whole design. The Silver arrow is in the Heidi Swapp puffy stickers. I chose silver as the accent and bling tone on this page.
The photo mat is adhered to the page with quite think foam adhesive dots. This is because the peg created quite a bulk on the page and a thick foam dot was needed to even it back out flat.

I loved layering all the different papers on this page. I was able to use the lime paper from Pink Paislee’s Fancy Free collection as the first layer. I then layered multiple papers from the kit making sure to alternate between bold and busy patterns to more subtle calm patterns. I added some definition to the notepaper exclusive by Kim Watson by adding a binding edge punch to the left side.

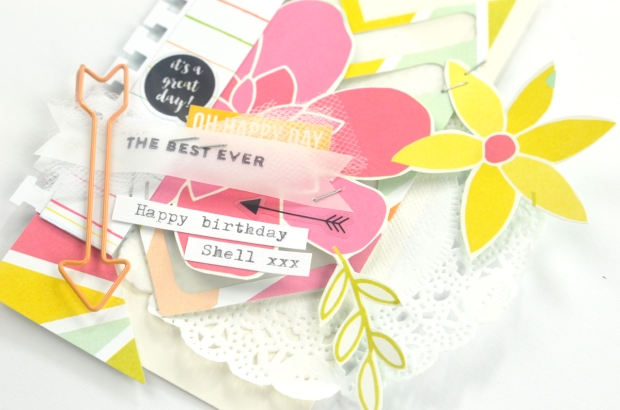
I was having to much fun with the kits, so while all these pretty goodies were out around me I decided to use some of them on a tag for a birthday present. I used one of the off cuts from my silhouette cutting to create a mega arrowhead. I backed that with vellum to help it stand out. I also added more of the binding edge to scraps of the notepaper patterned paper that I had cut off. 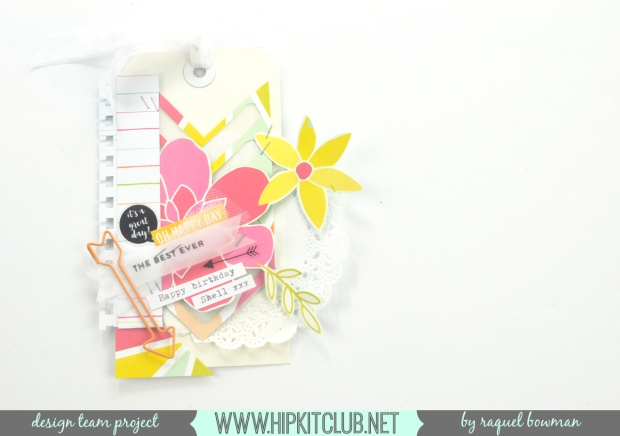
Once I had the foundation of the page done I was able to embellish. I just had to cut the florals from the Simple Stories Sunshine & Happiness paper. I love that is made such a statement on the tag. I then added a touch of embellishments like stickers, a clip and a title which was stamped on vellum and backed with some tulle.
Raquel xxx

No comments
Post a Comment